-
How Do I Setup Email for Iphone?
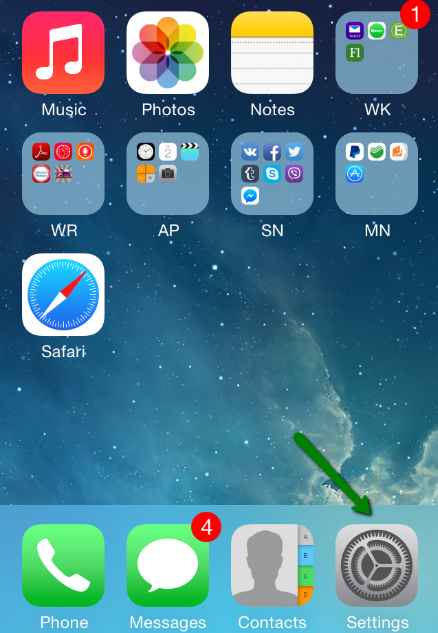
1. Select Settings from the home screen of your iPhone:
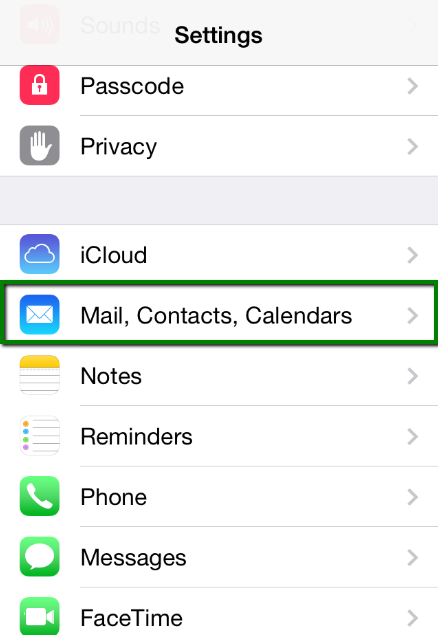
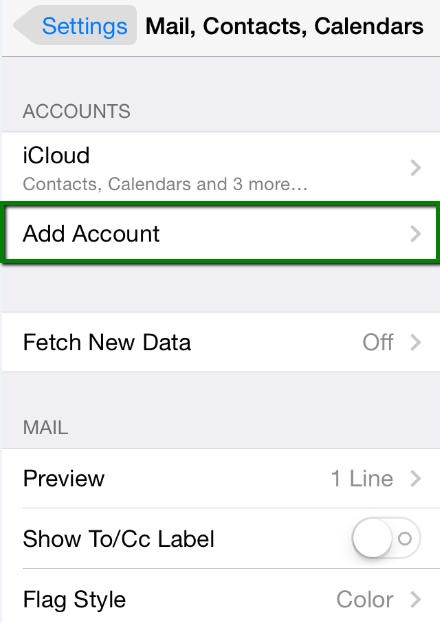
2. Choose Mail, Contacts, Calendars and click Add Account:
3. Choose Other from the list that appears:
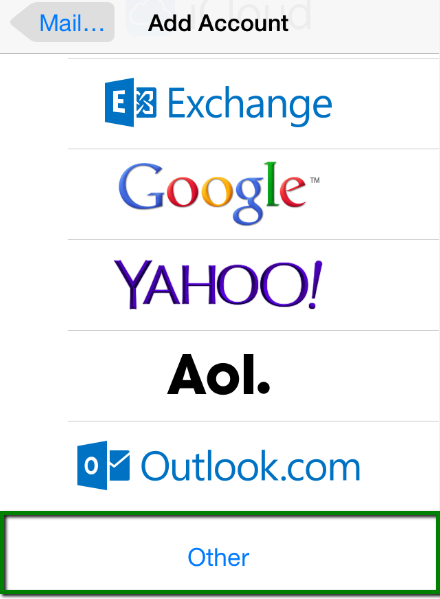
4. Select Add Mail Account. In the New Account menu, you will need to specify the following records:
- Name – your name (will appear as sender name)
- Address – your full email address, as created with CrossKhoj
- Password – the password for this email address
- Description – lets you specify any description (we suggest you use your email address)
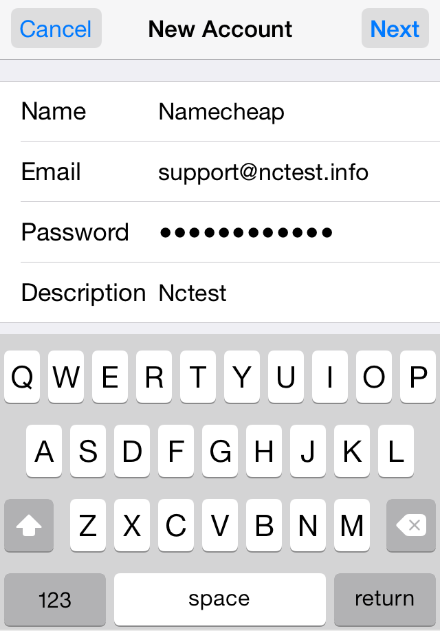
Click Next.
5. Select protocol type: IMAP or POP3. We advise you to use IMAP. Your selection will be highlighted blue.
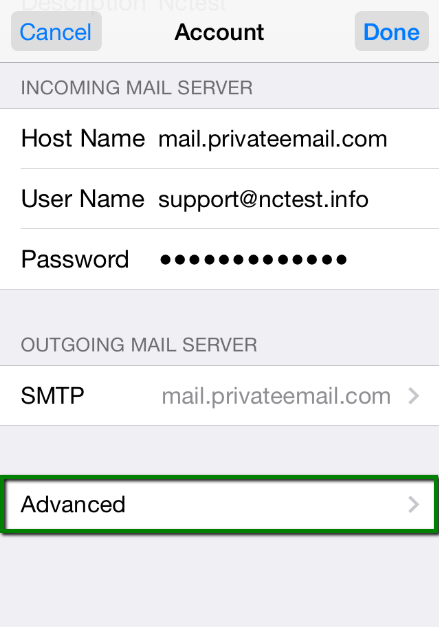
6. Settings are the same for both IMAP and POP3:
- Name, Address and Description: should have been already filled in
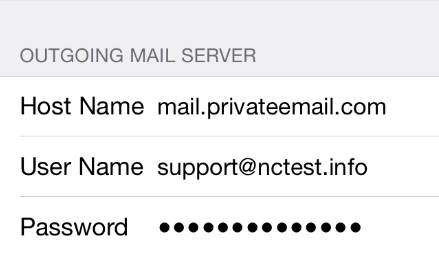
- Host name: mail.privateemail.com
- User Name: your email address
- Password: password for your email
In the fields for both Incoming Mail Server and Outgoing Mail Server, indicate the following settings:
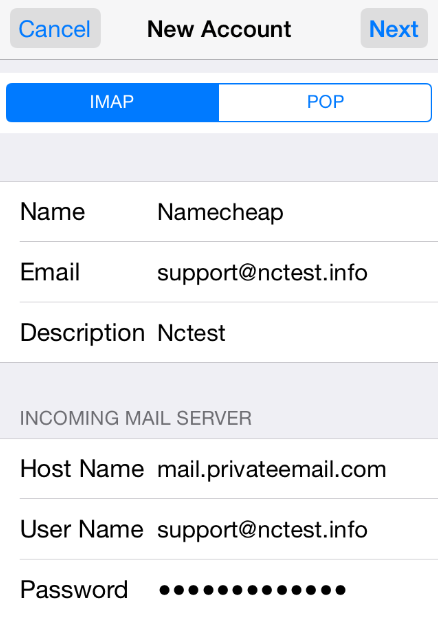
Click Next.
7. If you use IMAP, you can enable the following services:
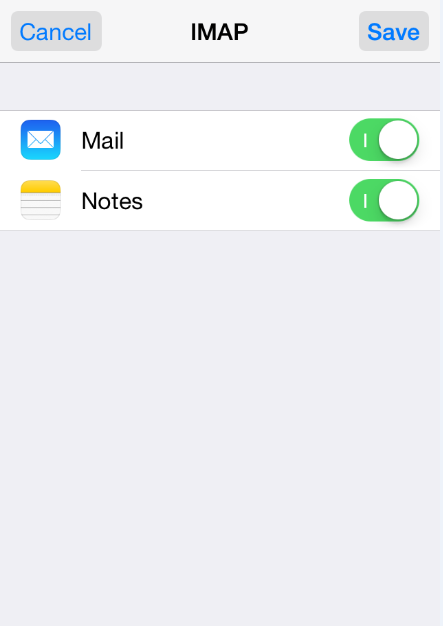
Click Save and wait while the system completes necessary checks.
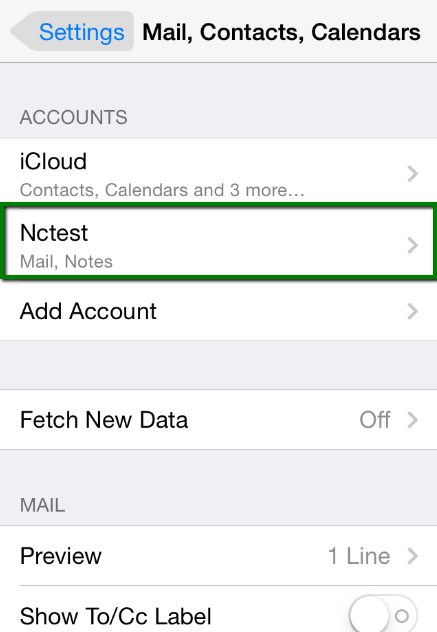
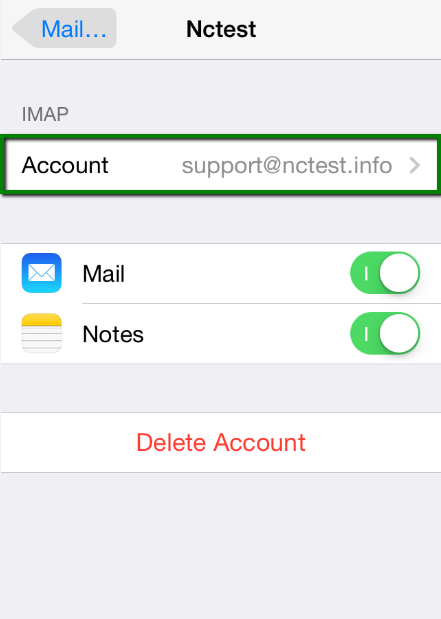
8. When the checks are finished, you’ll be redirected to the Mail, Contacts, Calendars screen. Choose your newly created account there:
9. Scroll down and select Advanced:
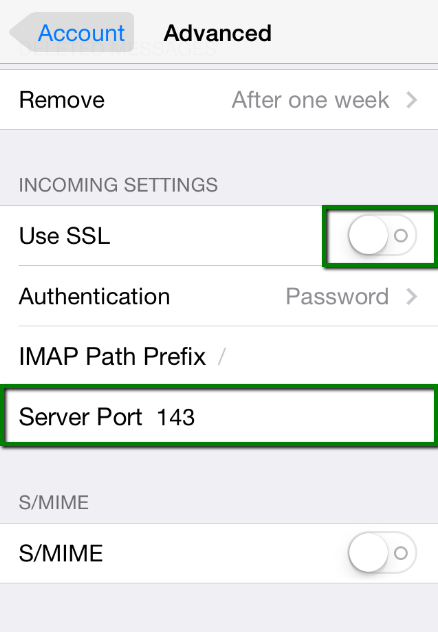
10. Here you can choose additional settings for IMAP or POP3.
If you set IMAP connection, you need to use port 993 (with SSL) or port 143 (without SSL).
Set IMAP Path Prefix to INBOX: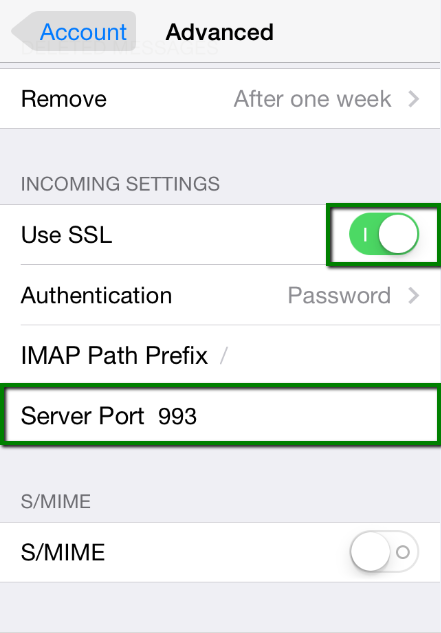
or
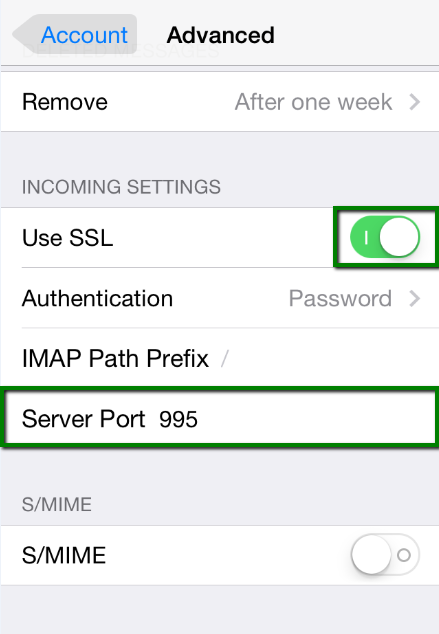
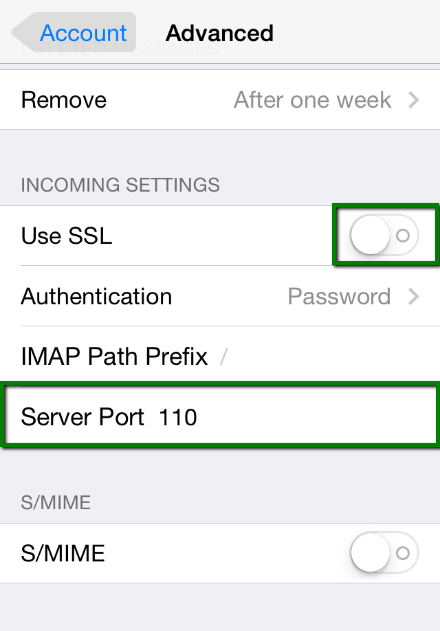
If you chose POP3, you need to use port 995 (with SSL) or port 110 (without SSL):
or
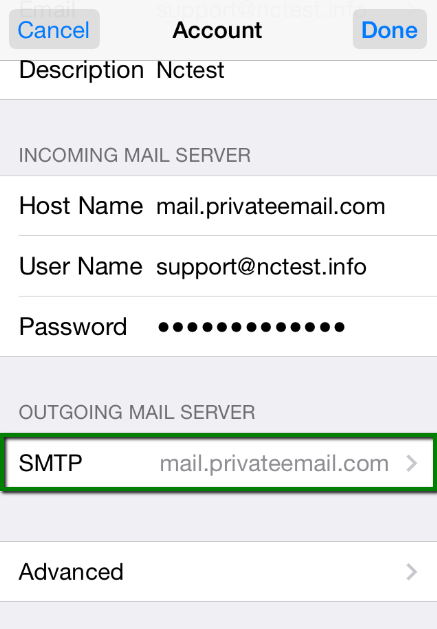
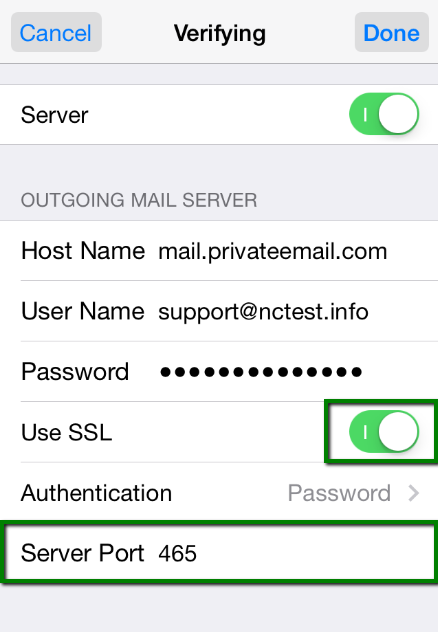
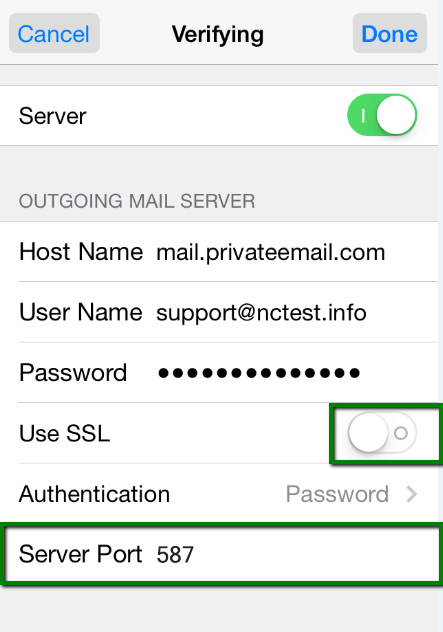
11. In order to set up additional settings for outgoing server, you will need to return in the previous menu and then go to Outgoing Mail Server by clicking on the host name of the server:
12. For Outgoing Server (SMTP), select port 465 (with SSL) or port 26 (without SSL):
or
Once the settings are verified, your account is active and ready to use.
To test your new email account, go to Messages and try sending and receiving emails.That’s it!
-
How do I setup Mail for Android?
Email account setup on Android
In order to configure your email on Android phone, follow this instruction:
1. Enter Mail on the main screen of your Android phone.
2. Select Other (POP3/IMAP) and click on New Account.
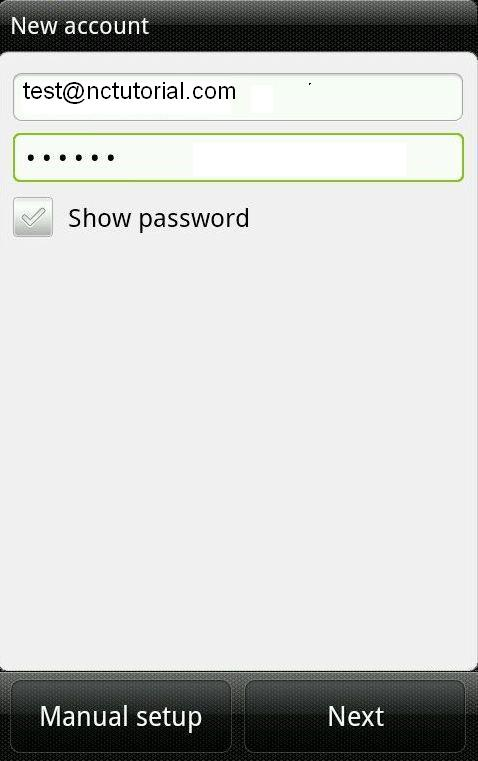
3. Insert your full email address and password for it in the appropriate fields:
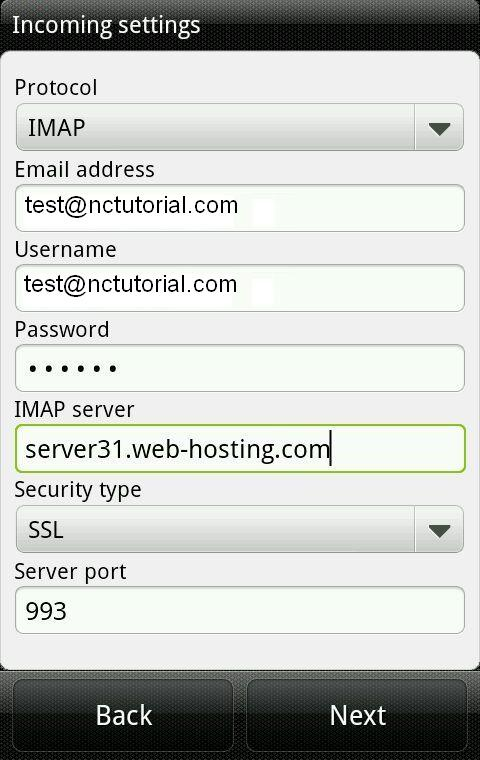
4. Click on Next. Select protocol type: IMAP or POP3. We advise you to use IMAP.
If you choose IMAP protocol, you will need to indicate following fields:Email address, username and password should have been already filled in the corresponding fields.
Host name: mail.yourdomain (e.g. if your domain is crosskhoj.com, your webmail will be accessible at mail.crosskhoj.com)
If you do not want to use Secure Sockets Layer connection you need to use port 143 (None):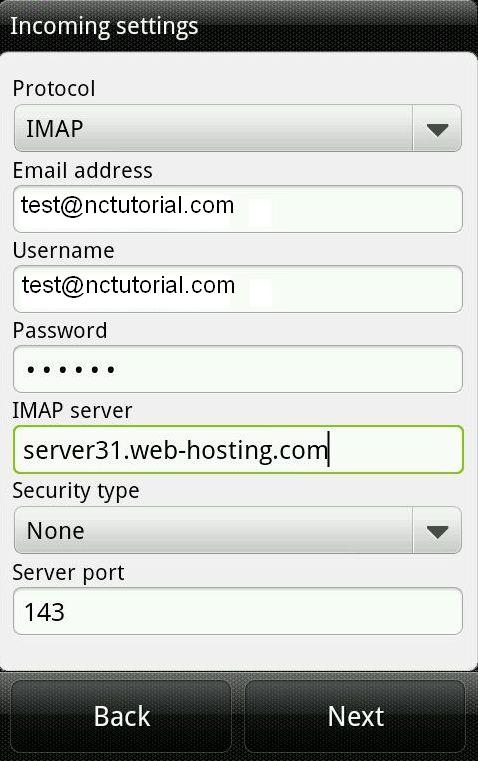
5. If you want to use Secure Sockets Layer connection you need to use port 993 (with SSL):
Clink on Next.
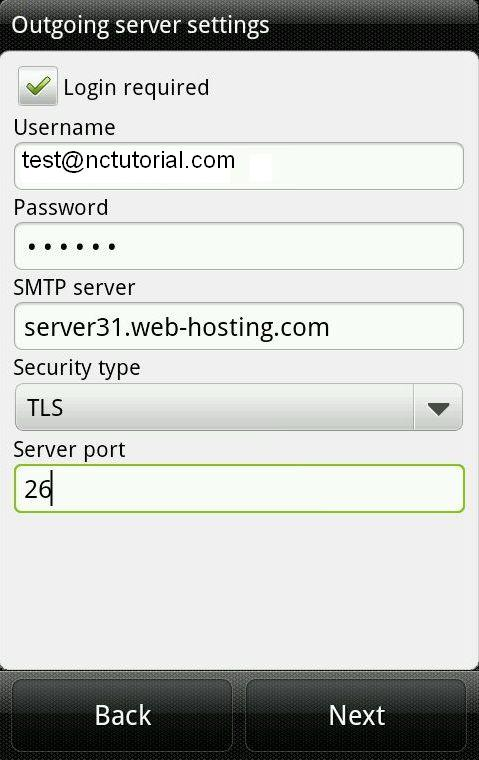
7. Enter the Outgoing Server Settings in the following way:
Email address, username and password should have been already filled in the corresponding fields.
Host name: server name where your hosting account is located (it is possible to use server IP-address or mail.yourdomain.tld if you do not want to use SSL)If you do not want to use Secure Sockets Layer connection you need to use port 25 (None):

8. If you want to use Transport Layer Security connection you need to use port 26 (with TLS):
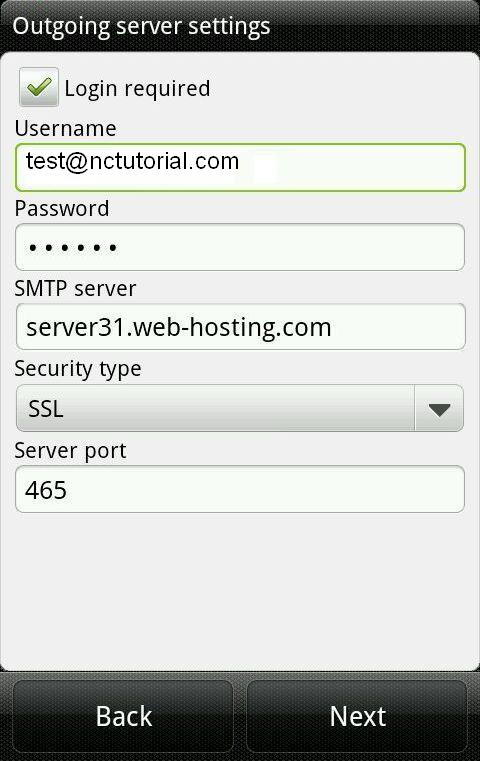
9. If you want to use Secure Sockets Layer connection you need to use port 465 (with SSL):
10. Click on Next and insert Account Name that you want to use:
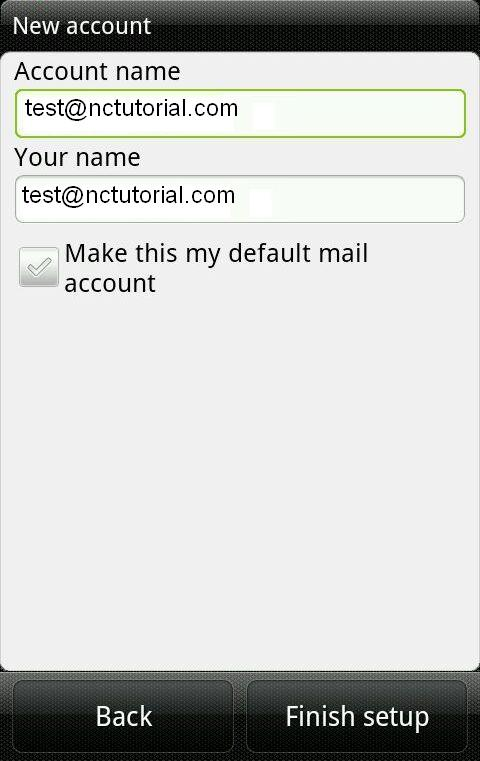
Click on Finish setup.
-
How do I access my email?
If you have purchased an email package, here are the settings:
Webmail: mail.yourdomain (e.g. if your domain is crosskhoj.com, your webmail will be accessible at mail.crosskhoj.com)
Username: your email address
Password: password for this email accountGeneral settings for Email clients:
Only encrypted connections are supported by our mail servers, so please use the following settings:
Username: your email address
Password: password for this email account
Incoming/outgoing servers name: mail.privateemail.comIncoming server type: IMAP or POP3
Incoming server (IMAP): 993 port for SSL, 143 for TLS/STARTTLS
Incoming server (POP3): 995 port for SSL, 110 for TLS/STARTTLSOutgoing server (SMTP): 465 port for SSL, 25 or 26 for TLS/STARTTLS
Outgoing server authentication should be switched on, SPA (secure password authentication) must be disabled. -
How do I add a sermon to my site?
1. FTP your mp3 file to the site
You can do this using the instructions given in the support FAQ. Please pay attention to the recommended guidelines.
2. Login to your sermon control panel
- URL: http://yoursite.crosskhoj.com/wp-admin
- Click on “Sermons” on the left-hand side panel.
- Click on “Add Sermon”.
- The mp3 you just added will be available using the dropdown “choose existing file”.
3. Insert your sermon details.
- Title: Name of the sermon, any text is acceptable
- Tags: A list of search words which will help users find this sermon – we recommend adding at least 3-4 tags
- Preacher: You can select from the dropdown or “Create New Preacher”.
- Series: Select from the dropdown or “Create New Series”
- Date: Date sermon was preached. Be accurate, otherwise it will be hard to find this sermon later.
- Service: Select Service. Usually “Sunday Morning”.
- Bible Passage: Enter “From” and “To” (for example, if the message was on Romans 12:1-2, then “From Romans 12:1” and “To Romans 12:2”. You can add multiple texts. The site will display the ESV translation. For single verses, both the “To” and “From” will be the same verse.
- Attachments: You can select the mp3 you have just uploaded to link it to this sermon. You can also upload documents and PDFs (sermon notes, charts, etc).
4. Save new sermon
Click “Save”. Your sermon will now be available on the site.
-
How do I FTP sermons to my site sermon folder?
1. Download an FTP client.
(We recommend Filezilla Client.)
You will have received your FTP username and password in your email. Use the following details to connect to your sermon directory, where you can upload mp3s to be used with Sermon browser.
2. Connect to your sermon directory
Instructions for Filezilla. Connect using Site Manager (File->Site Manager)
- Host: crosskhoj.com
- Protocol: FTP
- Encryption: ‘require explicit FTP over TLS’
- Username: [as provided]
- Password: [as provided]
- Port: leave empty.
Click “connect” or “quickconnect”. You will be taken automatically to the correct directory for your site. Here you can copy files to be used with Sermon Browser (pdf handouts, mp3 files, etc.).
3. Copy your files
You can do this using drag and drop from your computer. When a file finishes uploading, it will be automatically available to use in your sermon browser control panel.
4. Important Guidelines
Note: we strongly recommend using compressed mp3 files for sermons, size between 10-15 MB max. This will save your site space and speed.
Warning: Be careful with your files! Deleted files will be removed from your site and cannot be recovered.
MP3 File names: do not use special characters (~!@&*)””) in filenames. Try to be organized with naming (e.g., YYYY-MM-DD_name.mp3) so that you are able to find files easily. Over the years, you will have a lot of files in one directory!
Contact us at web@crosskhoj.com if you have any issues.